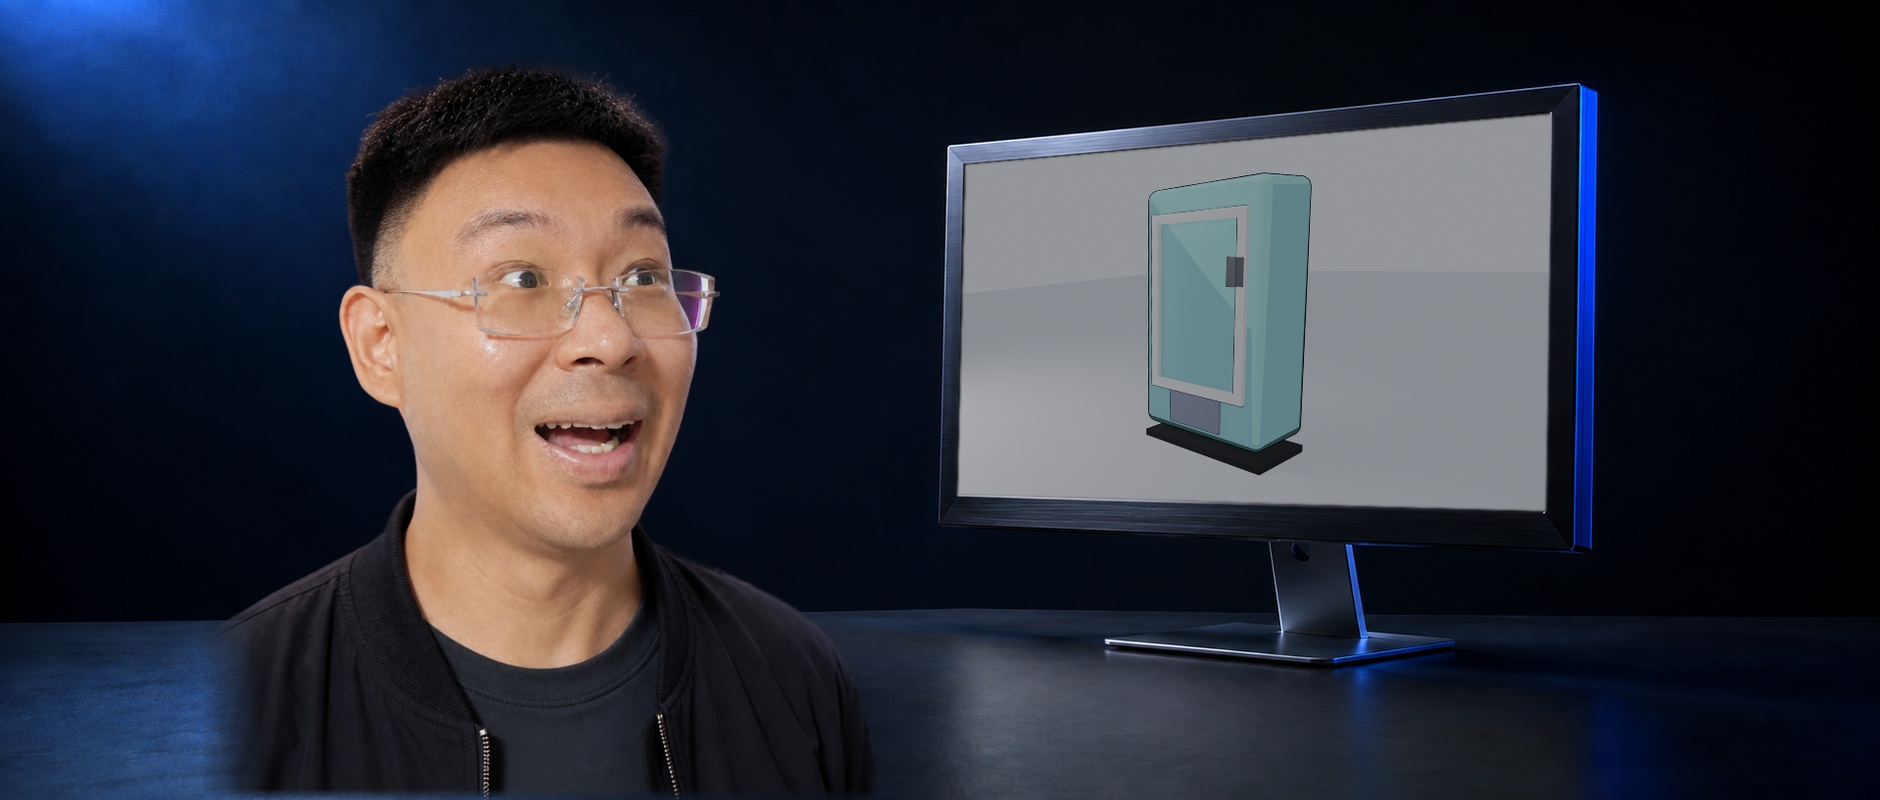
Info: Machine translation This post was machine-translated from the Chinese original. Wording may be rough in places — the Chinese version is authoritative.
Summary The local 27B model was tested in Blender via MCP, with five rounds in LocalBrain totaling 174 minutes: whether you can get hands-on, how long it takes, and whether you can spot and fix errors yourself. 2026-09-15·HyphenTech
Can the Local 27B Model Operate Blender? I brought Bilibili’s method into LocalBrain and ran it five times
Someone used OpenCode to operate Blender 5.2.1 via blender-mcp to create a small rural station convenience store scene in a three-render, two-way style.
What I wanted to verify was another thing: whether this method would work without OpenCode and put into my own LocalBrain. The evaluation focused on three points: whether it could be hands-on, how long it would take, and whether I could find and fix errors myself. On September 14 and 15, I ran five rounds on the M5 Pro 64GB, one vending machine took 174 minutes, and I still didn’t finish it, but the reasons for each failure were always identified.
Summary: Let’s start with the conclusion
- Local 27B can model step by step using LocalBrain and blender-mcp, managing saving, rendering, and continuing from checkpoints; But with only about 9.5 tokens per second, five rounds totaling 174 minutes, one three-render, two-vending machine still isn’t finished.
- The delivered renders are all black, and after checking, there’s only one checkmark: the outlined casing material is not removed from the back. The six cans of drinks in the window were also made, but sealed inside the solid body without window openings.
- When only text receipts and viewport screenshots were given, it treated the black image as delivery and even corrected the wrong parts in the screenshots; After adding the rendering viewing capability, LocalBrain noticed key issues like full black and no jars every time. In the fifth round, it used the correct method and found the reason for the window hole being sealed.
- It repeatedly gets stuck on the wrong interface, with old codes changed in the new version and functions that don’t exist at all; Even when you try to search online, it never checks even once.
- The telemetry of blender-mcp is enabled by default, and the clause allows prompts and operation records to be used to train AI models. Before installing, turn off both switches.
The final footage and effect judgments in the video come from the original author; I did not reproduce their scenes; The LocalBrain part was generated locally by my machine, with logs, checkpoints, and renderings all preserved. The root cause of the blackmap was verified by rendering item by item in the Blender backend, not the model output.
▍Three lessons worth copying from the video
First, let’s explain the link. MCP is the protocol that allows the model to call external tools. Blender-MCP is split into two halves: one half is the plugin installed in Blender, commanding on port 9876 and other commands on the local machine; the other half is the MCP server, which converts the model’s tool calls into requests sent to the plugin. The real work mainly involves execute_blender_code, meaning the model writes a Python segment and executes it directly in Blender.
First, whether to break down a task depends on two things. First, the strength of the model: if you don’t dismantle a weak model, the results are basically unreadable; The stronger the model, the more likely it is to complete it in one go. Second, between several rounds of requirements, whether each can stand outside the code level. He cites two games he has worked on as examples: FPS games can first be made with shooting and enemy mechanics, with scenes supplemented later, since you can run on only a flat patch; The gameplay of clicking to destroy the scene is tightly bound to the model structure, so building the scene first may not connect the subsequent destruction logic, making it suitable for one generation. Pure modeling has many scene elements and requires a unified style and layout, so he chose to explain all requirements at once.
Second, write the first round of requirements as a structured list. You can see the order in which he writes them in the visuals. First, summarize the scene, perspective, and three renderings and two styles, then require the core requirements to be organized into AGENT.md: execute autonomously to completion, no questions midway, and compress over 70% of the context yourself. Then provide the Blender version and installation path; from the path, it can be seen that he uses Windows. Next are the architectural constraints: don’t pile all assets into one huge .blend; each model is a separate file, and finally assemble in main.blend. After that comes the step list, quality priority, art style and layout, itemized asset lists for outdoor and in-store, rendering standards and cherry blossom falling effects, and finally repeating the hard constraints again.
Third, put the status into the file. AGENT.md. The split model and step list are meant to let the model continue even if the context is broken. The video handles it this way: modeling is very context-dependent, so if it goes too far, start a new conversation to continue. After the first round, he had the AI fix a few more rounds: cherry blossom leaves were too scattered, rendering lacked shadows, and the three-rendering and two-stroke strokes were insufficient. The front wheel inner tube of the bicycle turned incorrectly, so he didn’t bother with AI and directly changed the parameters in Blender.
He candidly stated in the video: Qwen 3.8-27B can operate Blender, but it’s clearly not as smooth as GPT-6, and 27B is still smaller. The final Plan B uses Three.js generation for the same request, which is much better and several times faster compared to him; Blender has a higher ceiling, and skilled users can manually adjust it to produce better rendering.
▍To import into LocalBrain, you first need to add an external MCP
LocalBrain’s original dialog only recognized 7 built-in tools (documents, networking, voiceover, transcription, images, videos, local files), and couldn’t connect to blender-mcp. So I added ‘external MCP server’: in the settings, paste the mcpServers configuration from the item README, click to test tools that list server declarations, and check which ones to assign to the model. This part has already been written into LocalBrain’s source code, but no new version has been released yet.
During the process of fixing, I hit two pitfalls I usually wouldn’t notice. The first was that commands couldn’t be found: apps launched from Finder only inherited the system’s streamlined PATH, and the uvx and npx available in the terminal didn’t exist in the app. The current approach is to first read the login shell PATH, then parse the command. I simulated Finder startup using a PATH that only had the system directory, and even with just writing uv, it still found it. Starting blender-mcp and listing tools took 0.33 seconds.
The second issue is that tool descriptions take up too much space. blender-mcp declares a total of 28 tools, with names, descriptions, and parameter definitions compressed into a compact JSON containing 30,062 characters, mostly cloud asset tools like Poly Haven and Sketchfab that are closed by default. The local model requires rereading these instructions every round, so in the first two rounds I only checked the three categories: viewing scenes, viewing objects, and executing code, leaving 2,723 characters; the later rounds plus viewport screenshots totaled 3,573 characters.
▍First three wheels: Able to do things, slow down, can’t see and you’ll flip the car
The model used the ready-made Qwen 3.8-27B ABLITERATED Q8_0 on this machine, which is larger than the IQ4 shown in the video, and the server log decoding speed is about 9.5 tokens per second. The task is much smaller than in the video: just build a vending machine with a three-render, two-tone style, glass windows, six cans of drinks in different colors, a coin slot and a pickup slot, and finally save .blend and render a 1280×720 image. After five rounds, it looks like this:
| Round | Duration | What can the model see? | The result |
|---|---|---|---|
| First round | 25 minutes | The text was returned and held back | Out of 13 pieces of code, 7 failed to execute and were neither saved nor rendered |
| Continue running from the checkpoint | 19 minutes | The text was returned and held back | Save and render, deliver the image completely black |
| Round three | 40 minutes | Screenshot from the camera | Pure black is recognized, but only the outlined shell is hidden at the viewport, rendering it black as well |
| Round four | 45 minutes | Final rendering | The black map was removed, but the outline disappeared, and the jar was not recovered |
| Round five | 45 minutes | Final rendering, networked search | I opened the back to remove and preserve the outlines, found the window hole sealed, and didn’t have time to fix it |
The reason for the first round failure is quite typical. This Mac system language is Chinese, and the node Blender created is called ‘Principled BSDF.’ According to English conventions, the Principled BSDF can’t be found directly. Some color attributes require 3 values, some require 4, and it spins here for 4 consecutive rounds, even writing a non-existent property in between. On these 7 failures, Blender-mcp marked all as successful calls, but only wrote ‘Error’ in the body. LocalBrain only counted 3 consecutive error alerts and 5 stops when the tool received error marks, not a single time.
The second round continued from the checkpoint. The video was full of context and needed to start a new conversation. LocalBrain saved the complete task log and plan, and when continuing the run, it directly connected with the history of 20,896 tokens. After 19 minutes, it delivered: saved the .blend, rendered the image, checked the PNG file header, and confirmed the size was 1280×720.

It can’t see this image, so it can only state in the reply that the visual effects weren’t pixel-checked. To be honest, regular users reading ‘Completed’ and two file paths will most likely think the work is done.
In the third round, I asked it to use the viewport to screenshot the image. LocalBrain would have the original task to have the model look at it once when the tool returned the image and the current model supported vision, only adding three rows of observations to the dialogue. The first screenshot lasted 19 seconds and said the cargo plane’s surface was pure black, with no visible coloring, outlines, glass windows, or drink cans. But then it only hid the 11 stroked shells inside the viewport, screenshots returned to normal, rendering remained completely black.
▍How the Black Map Comes From: Missing a checkbox
A common way to outline cartoon models is to attach a black shell that is a size larger than the object, flip the normal inward, and then remove the material from the back. From the camera, the side facing the camera is removed, leaving only a ring of black border visible at the object’s edge.
I opened the delivered file in the Blender backend and checked item by item: all 11 stroke shell normals face inward. I checked three different reading methods and found the conclusion consistent: the model was correct at this step; The only missing item is the “Back Rejection” checkmark on the casing material. Without removal, the entire black shell will be rendered, wrapping around the body, making it completely black.
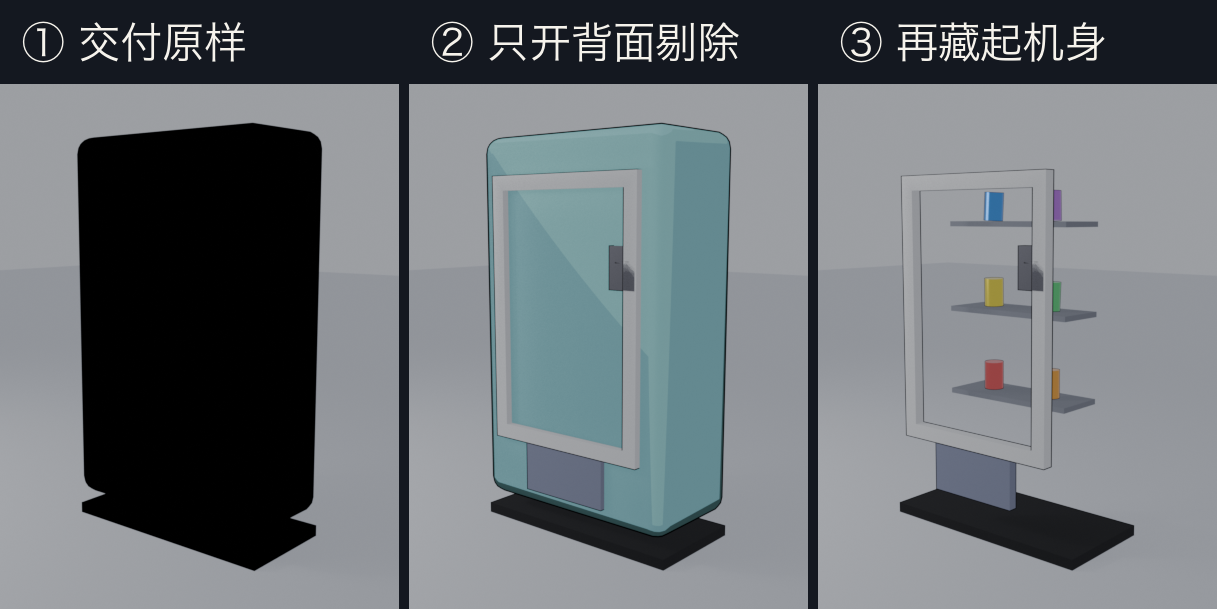
The cans are invisible is another issue. The body is a solid box with no modifiers, with no window holes at all; The glass is placed 5 centimeters inward on the front surface of the body, while the shelves and six cans of drinks are further inside, all sealed inside the box. The “Brechet window” and “rear removal” mentioned in the model’s reply are also absent in the scene.
▍Let it see the final renderings: Round 4 and Round 5
The problem was with the acceptance target: the second round only checked the file header, the third only looked at the viewport, no one ever saw the actual delivered image from start to finish. So I added view_image to the built-in file tool, so the model could directly view the image files rendered by itself, and after reviewing, only wrote a few lines of observation into the dialogue. Then we started over from the same completely black scene, requiring it to re-render and view new images every time it made a change.
The fourth round lasted 45 minutes, rendering and reviewing four inspection images. Each time it looked at the images for 18 to 22 seconds, and all four observations matched the images: the first two times it was reported as completely black; the third time pointed out the machine came out but couldn’t see the jar in the window; the fourth time pointed out that the outline was not obvious or looked like a three-rendered two-way image. The black image was indeed gone, but the method was to shrink the stroked shell to be smaller than the body and stuff it inside, so the strokes disappeared accordingly. After removing the back, it never touched it, and the can’s issue was nowhere to be found.
In the fifth round, I clearly wrote Blender 5.2.1 and the Chinese interface on the first line of the task, which is the same approach as shown in the video, and also assigned it the native web search that was already in the dialogue. This round of code failed 8 times, mostly due to mistakes or programming interfaces: the Transmission input for the BSDF was renamed in version 4.0 and still searched under the old name; The bmesh did not even have its flip normal function. The four networking tools were there, but it never checked the documentation.
It even wrote a script to compare normal directions, and the flip reads “150 faces in the same direction,” so the comparison method itself is wrong, so it detours around the normal direction. Fortunately, at 38 minutes, it opens the back for removal. After re-rendering, looking at the image for 13.6 seconds, it shows a blue-green vending machine with dark outline lines, fully in the frame, except the drink can is not visible through the glass window.
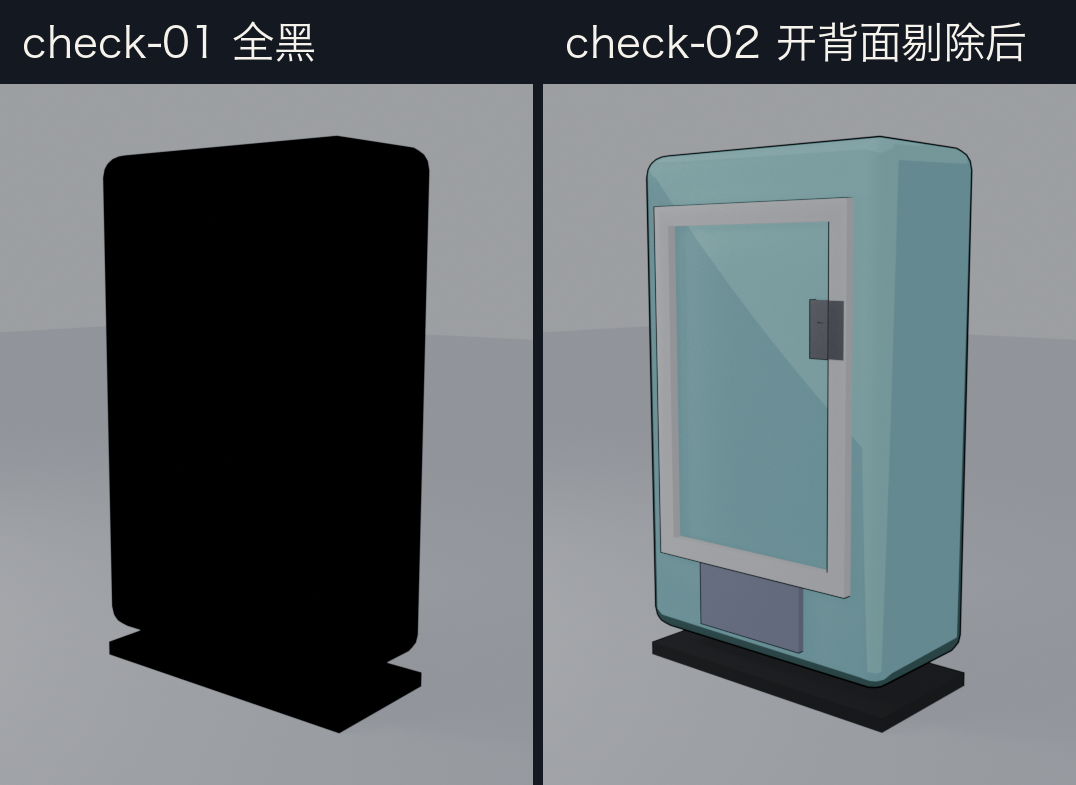
In the last few minutes, it checked the window frame area and concluded that the front wall of the device had sealed the window opening, which was the second root cause. The budget was just used up, so there was no time to fix it or deliver the final documents.
▍What can be proven this time, and what can’t be proven?
There are three things to prove. First, the local 27B model can be modeled step by step using LocalBrain to set up an external MCP, and the entire process of saving, rendering, and continuing runs is handled smoothly. Second, the speed of the Q8_0 on this machine can’t support scenarios on the scale of video: a vending machine takes five rounds in 174 minutes and still isn’t finished. Third, the acceptance object determines whether the model can fool itself: just by looking at the text, it treats the black image as complete; only by looking at the viewport, it corrects mistakes. After seeing the final rendered image, after 4 plus 2 reviews, it never missed a single key issue: all black, no canisters, and missing outlines.
If you can’t prove it, make it clear. If the sample only has this one task, you can’t predict the success rate. The fifth round changed two conditions at the same time, starting from the same starting point as the fourth. It used the correct method, but it couldn’t be credited to either the specified version or the online search—maybe it was just luck this time. If you switch to IQ4 or another model, the speed and error location would change; I didn’t reproduce the scene in the video.
▍Local running models may also have prompt words taken away
Let’s start with code permissions. execute_blender_code means the model can execute any Python in Blender, capable of reading and writing files. Blender-mcp provides a BLENDER_MCP_SAFE_MODE=1 whitelist mode, but some operations are rejected.
Another thing that’s easier to overlook: the Allow Telemetry switch in plugin preferences is checked by default. Its terms of use were updated in August 2026, with a detailed list of items: prompts, generated code, object and material information in the scene, and viewport screenshots. There’s also the operation trajectory, including the target, each action, the scene state before and after changes, and whether you accepted, rejected, or corrected the action. During server runtime, the names of operations you personally performed, as well as undo and redos, are also recorded; If you press undo right after the AI finishes, it will be considered rejected. On the server side, out of 28 tools, 24 have user_prompt parameters. The instructions require the model to fill in the user’s original words verbatimly, and to include multi-step tasks every time they call.
The terms for collecting this data are very straightforward: the author says it’s currently collected for possible future uses, possibly for training AI models in 3D creation and Blender automation, or even removing direct labels and releasing it as a public dataset. Turning on telemetry means granting him a global, royalty-free, permanent license; Once data is used for training or in public datasets, it cannot be completely deleted. The clause also states that data is not for sale; this is an open-source project maintained solely by him in his spare time.
The tool is free; you pay for your prompt, scenario, and each recall: the clause allows these records with accept and rejection marks to be used to train the model. If you deploy the model locally just to keep data from being local, this default checkbox must be handled first. Another detail: just uncheck the box, the server will still send anonymous usage records, including randomly generated installation IDs, tool names, success/failure, and time spent; Set DISABLE_TELEMETRY=true in the server’s environment variables to stop reporting events and trajectories. This time, I closed both and ran them in the source code.
▍Who is it suitable for, and how to get started
Suitable for those who already know a bit of Blender and are willing to supervise and modify themselves: Let the model build a white model, arrange layouts, batch generate duplicate objects, and adjust details and final effects yourself. This time, I could render the two root causes item by item using scripts to locate them; 27B spent nearly three hours running around before finally finding both root causes and only fixed one.
It’s not suitable for people expecting a finished image from a single sentence, nor for machines with decoding speeds of about ten tokens per second running large scenes. If you just want to put several procedural 3D models on your webpage, just follow the video’s Plan B to generate Three.js faster.
If you really want to try, the recommended order is as follows. First, install Blender and blender-mcp, turn off both telemetry switches, and only select the few tools you need. Specify the Blender version in the requirements, and leave the steplist and intermediate files on disk. During acceptance, have the model see the final rendered image instead of a viewport screenshot, and finally open the render yourself to take a look. When outlining the reverse case, remember to open the back to remove it; if you need to make a window opening, make sure the Bull is actually cut to the body.
Tip Original video: “No Need for GPT-6! Local Model Operation Blender Modeling Tutorial”: https://www.bilibili.com/video/BV1MfYu68E73/ blender-mcp project: https://github.com/ahujasid/blender-mcp Blender official website: https://www.blender.org/ LocalBrain Download Page: https://github.com/HackerChi-Hub/localbrain-releases/releases
🧰 Tools I build
I maintain all of these tools myself. Preview builds are clearly labeled; the release pages are the source of truth for downloads, updates and known limits.
Info: HyphenBox Status: Official releases
A radar for free LLM APIs: availability is re-tested continuously, one local interface for all of them, and keys stay on your machine
Info: LocalBrain Status: Official releases
A multimodal MCP toolbox for local models: TTS, Whisper and video generation in one place
Info: ScreenLex Status: Official releases
Learn new words while you watch shows. Free, for Mac and Windows
Info: HyphenScreen Status: Official releases
Screen recording and smart editing in one: a DaVinci-style timeline, automatic redaction and a check of the finished video before export. Free
Quote: HyphenTech Make AI your superpower Local deployment · Free resources · Self-made software https://hyphentech.top
Late nights and burned API credits went in,a cup of tea comes back out — only if you feel like it.
Scan with WeChatPress and hold to save the image, then open it from your album in WeChat Scan

Comments
Loading comments…